 Save to Pinterest
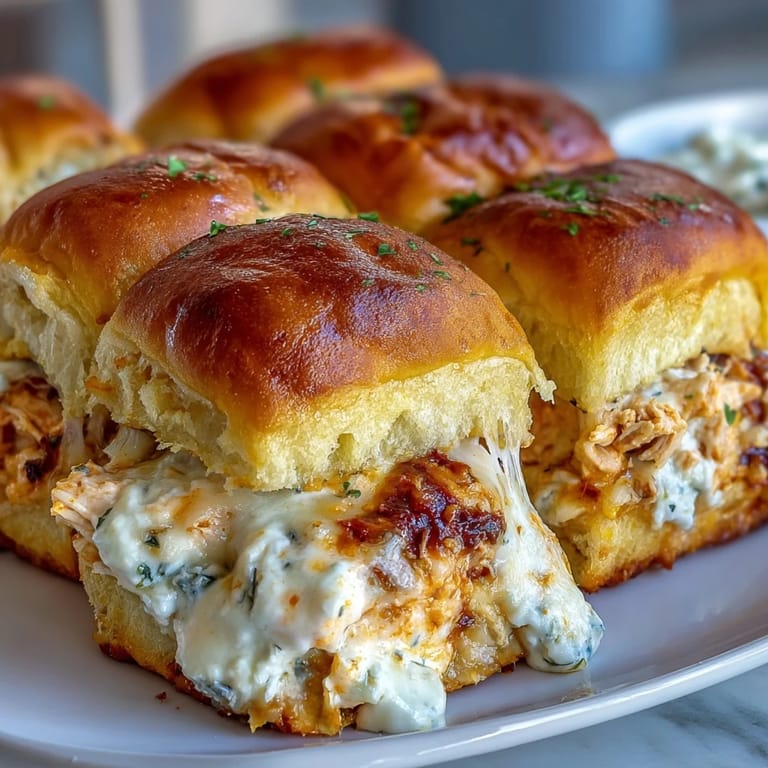
 My cousin showed up to a potluck with a tray of these sliders, and I watched them vanish in under ten minutes. Everyone kept asking what was in them, hovering near the table for seconds. The combination of tangy Buffalo chicken dip and soft, buttery buns was so unexpectedly good that I had to text her for the recipe before I even left. Now they're my go-to whenever I need something that feels indulgent but comes together without much fuss.
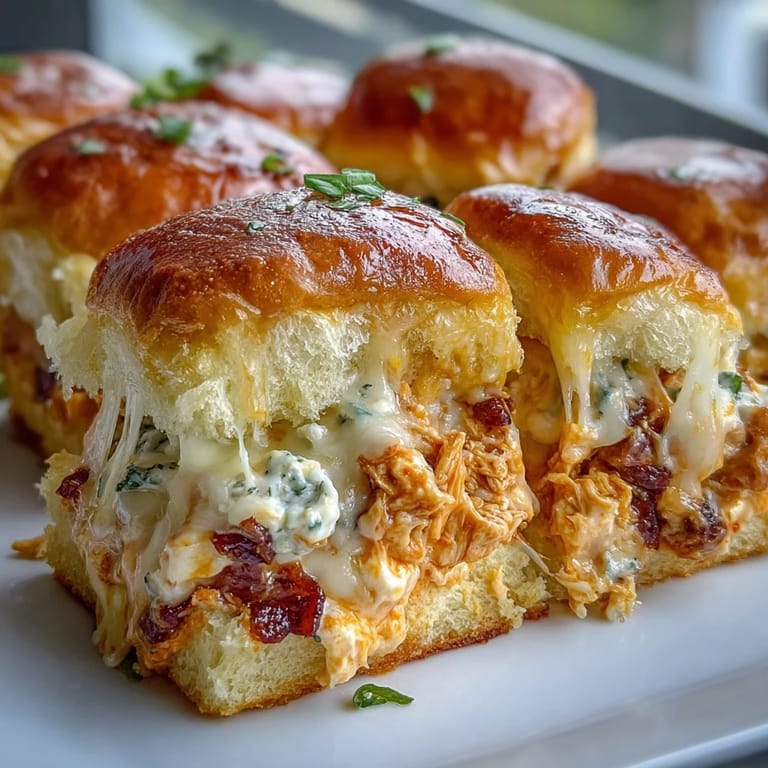
I made these for a game day gathering once, and my friend who claims she doesn't like spicy food ate three before admitting they were actually mild enough for her. The buttery garlic tops got golden and crispy, and the cheese bubbled up around the edges in that irresistible way. Someone suggested serving them with celery sticks on the side, which felt right, like honoring the Buffalo wing roots. It became clear pretty fast that these weren't just an appetizer, they were the main event.
Ingredients
- Cooked chicken breast, shredded: Rotisserie chicken works beautifully here and saves you time, just pull it apart with your hands or two forks for that perfect shredded texture.
- Buffalo wing sauce: This is what gives the sliders their signature tang and heat, so use a brand you actually like because the flavor really comes through.
- Cream cheese, softened: Let it sit on the counter for at least 30 minutes so it mixes smoothly without lumps, because nobody wants chunks of cold cream cheese hiding in their dip.
- Ranch dressing: It cools down the heat and adds a creamy richness that balances the Buffalo sauce perfectly.
- Sour cream: This makes the filling extra luscious and helps bind everything together so it doesn't slide out when you bite in.
- Shredded mozzarella cheese: It melts beautifully and gives you those satisfying cheese pulls everyone loves.
- Shredded cheddar cheese: Sharp cheddar adds a deeper flavor that plays well with the tangy Buffalo sauce.
- Slider buns: Hawaiian rolls are my favorite because they're soft and slightly sweet, which contrasts the spicy filling in the best way.
- Unsalted butter, melted: Brushing this on top ensures the buns get golden and toasty instead of soggy.
- Garlic powder: Just a little bit mixed into the butter makes the tops taste like garlic bread, which is never a bad thing.
- Chopped fresh parsley: Optional, but it adds a pop of color and makes the tray look a little more polished if you care about that sort of thing.
Tired of Takeout? 🥡
Get 10 meals you can make faster than delivery arrives. Seriously.
One email. No spam. Unsubscribe anytime.
Instructions
- Preheat and Prep:
- Set your oven to 350°F and lightly grease a 9x13-inch baking dish so nothing sticks. This is also a good time to pull out all your ingredients so you're not scrambling later.
- Mix the Dip:
- In a large bowl, combine the shredded chicken, Buffalo sauce, softened cream cheese, ranch dressing, and sour cream, stirring until it's smooth and creamy. It should look like a thick, cohesive dip, not soupy.
- Fold in Half the Cheese:
- Stir in half of the mozzarella and half of the cheddar so the dip has melty pockets of cheese throughout. Save the rest for the top layer.
- Slice and Layer the Buns:
- Cut the slider buns in half horizontally, keeping them connected if you can, and place the bottom halves in your greased dish. This makes assembly way easier and helps them bake evenly.
- Spread the Filling:
- Evenly spread the Buffalo chicken mixture over the bottom buns, making sure it reaches the edges. You want every bite to be loaded.
- Top with Cheese:
- Sprinkle the remaining mozzarella and cheddar over the chicken layer in an even blanket. Don't be shy, this is where the magic happens.
- Add the Tops:
- Place the top halves of the buns over the cheese layer, pressing down gently. They'll soak up some of the buttery goodness you're about to add.
- Brush with Garlic Butter:
- Mix the melted butter with garlic powder and brush it generously over the tops of the buns. This step is non-negotiable if you want that golden, crispy finish.
- Bake Covered:
- Cover the dish with foil and bake for 15 minutes so the cheese melts and the flavors meld together. The foil keeps the tops from browning too fast.
- Finish Uncovered:
- Remove the foil and bake another 8 to 10 minutes until the cheese is bubbly and the tops are golden brown. Keep an eye on them so they don't burn.
- Garnish and Serve:
- Sprinkle with chopped parsley if you like, then slice into individual sliders and serve them warm. They're best right out of the oven when the cheese is still gooey.
 Save to Pinterest
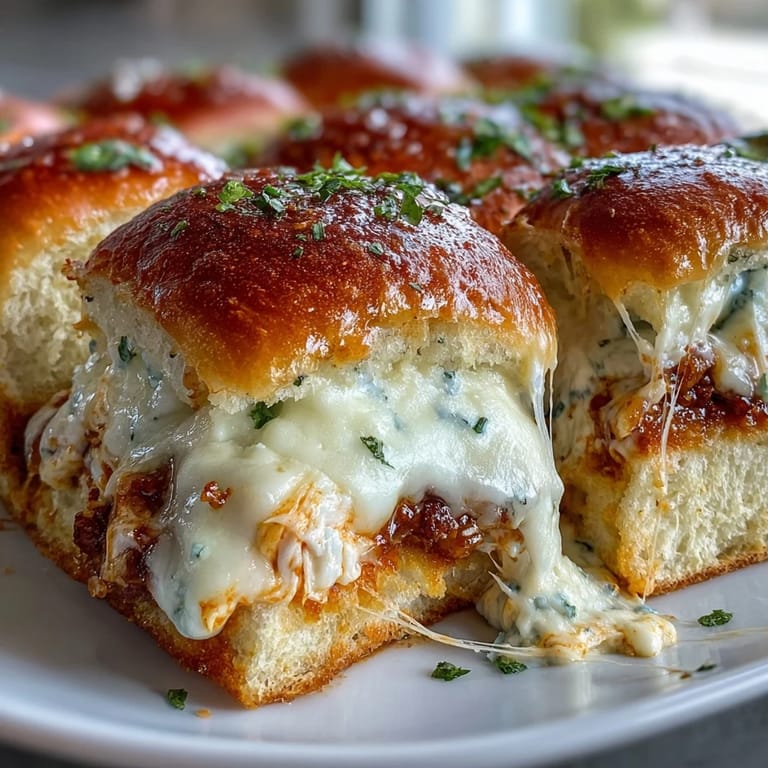
 One time I brought these to a backyard barbecue, and a friend who usually sticks to the grill came back three times just for these sliders. He said they tasted like the best parts of game day food all in one bite. I felt ridiculously proud watching people hover near the tray, sneaking one more when they thought no one was looking. It's funny how a simple dish can become the thing everyone remembers about a party.
Making Them Ahead
You can assemble these sliders completely, cover them tightly with foil, and refrigerate for up to a day before baking. Just add an extra 5 minutes to the covered baking time since they'll be going in cold. I've done this more times than I can count when hosting, and it's a lifesaver to have one less thing to worry about when people start arriving. The flavors actually have more time to mingle, which some people swear makes them even better.
Adjusting the Heat
If you're feeding a crowd with mixed spice tolerances, use a mild Buffalo sauce and put extra hot sauce on the side for people to add themselves. I learned this after watching a friend's kid refuse to try them because they looked too spicy, even though they weren't. You can also swap half the Buffalo sauce for more ranch to mellow things out without losing that tangy flavor. It's all about making sure everyone at the table can enjoy them.
Serving and Pairing Ideas
These sliders are rich and indulgent, so serving them with something crisp and fresh helps balance the plate. Celery sticks, carrot sticks, or even a simple green salad on the side keeps things from feeling too heavy. I like putting out a little bowl of extra Buffalo sauce and another of ranch for dipping, because some people can't resist dunking them even though they're already loaded with flavor.
- A cold beer or sparkling water with lime cuts through the richness perfectly.
- They pair surprisingly well with coleslaw or a tangy pickle tray.
- Leftover sliders reheat well in a 300°F oven for about 10 minutes, covered with foil so they don't dry out.
 Save to Pinterest
 There's something deeply satisfying about pulling a tray of these out of the oven and watching people's faces light up when they take that first bite. They're messy, cheesy, tangy, and completely worth it.
Recipe FAQs
- → Can I use rotisserie chicken for this?
Yes, rotisserie chicken works perfectly and saves time. Simply shred about 2 cups of meat from a store-bought rotisserie chicken for this dish.
- → How can I make these sliders spicier?
Add extra Buffalo sauce, a dash of hot sauce, or sprinkle cayenne pepper into the dip mixture. You can also use a spicier variety of Buffalo wing sauce.
- → Can I prepare these ahead of time?
Yes, assemble the sliders completely, cover tightly, and refrigerate up to 24 hours before baking. Add a few extra minutes to the covered baking time if starting from cold.
- → What can I substitute for Hawaiian rolls?
Any soft dinner rolls or slider buns work well. Brioche buns add extra richness, while regular white slider buns are a neutral option.
- → How do I store leftovers?
Store leftover sliders in an airtight container in the refrigerator for up to 3 days. Reheat in a 350°F oven for 10-12 minutes until warmed through.
- → Can I freeze these sliders?
Yes, freeze assembled but unbaked sliders wrapped tightly in foil for up to 2 months. Bake from frozen, adding 10-15 minutes to the covered baking time.