 Save to Pinterest
 My first encounter with hojicha cake happened on a quiet afternoon at a small Tokyo café, where the aroma of roasted tea seemed to wrap around everything like silk. The cake was impossibly light, almost cloud-like, with this subtle smoky sweetness that made me pause between bites. Years later, I finally attempted to recreate it in my own kitchen, and that first time I nailed the sponge—when it rose to triple its volume and that familiar roasted tea scent filled the air—I knew this was the recipe I'd been looking for.
I brought this cake to a dinner party last spring, and what struck me wasn't the compliments—though there were plenty—but watching my friend close her eyes after the first bite, completely transported by that roasted tea flavor. She told me later it reminded her of a tea ceremony she'd attended once, and somehow this humble cake had become a tiny window into a memory she cherished. That's when I realized this dessert does something special: it connects people to moments larger than itself.
Ingredients
- Eggs (4 large, room temperature): Room temperature eggs whip up faster and trap more air, which is your secret to that impossibly fluffy crumb.
- Granulated sugar (120 g): This gets whisked with warm eggs into a pale ribbon stage—don't skip the warming step, it makes a real difference in volume.
- Cake flour (120 g, sifted): Cake flour is softer than all-purpose, which keeps the texture tender; sifting prevents lumps that would weigh down your batter.
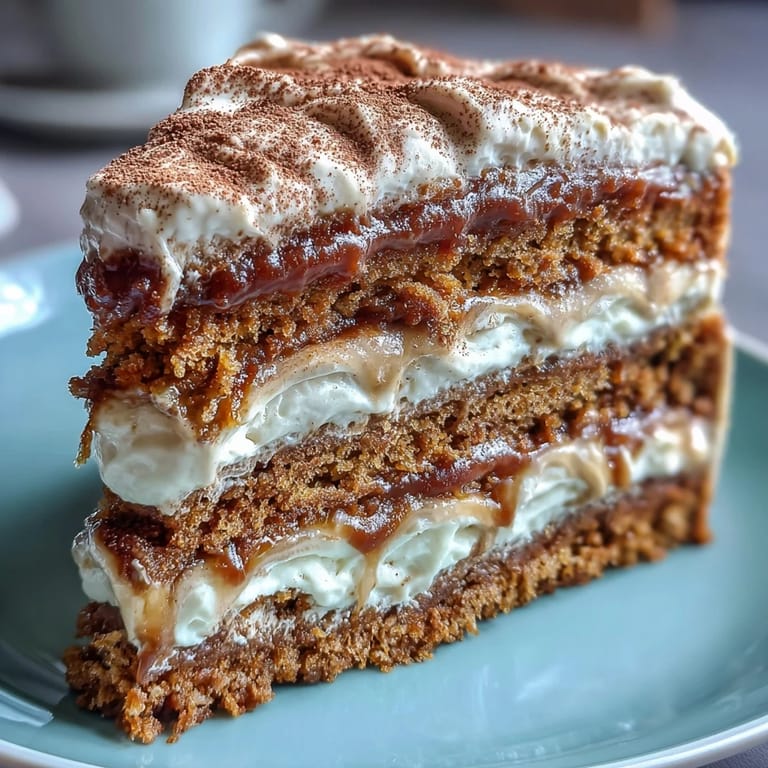
- Hojicha powder (20 g for cake, 10 g for cream): This roasted green tea powder is the soul of the recipe—find it at Japanese grocery stores or online, and make sure it's pure powder, not mixed with sugar.
- Unsalted butter (40 g, melted and cooled): Melting the butter first keeps it from weighing down the batter, and cooling it prevents it from cooking the eggs.
- Whole milk (30 ml, room temperature): The milk lightens the butter mixture so it folds in smoothly without deflating your carefully whipped eggs.
- Fine sea salt (1/4 tsp): Just a pinch brings out the depth of the hojicha and balances sweetness.
- Heavy cream (300 ml, minimum 35% fat): Higher fat content whips more easily and holds its shape better than lighter creams.
- Powdered sugar (40 g): Powdered sugar dissolves instantly into whipped cream without creating grittiness.
- Vanilla extract (1 tsp): A gentle vanilla rounds out the hojicha without competing with it.
Tired of Takeout? 🥡
Get 10 meals you can make faster than delivery arrives. Seriously.
One email. No spam. Unsubscribe anytime.
Instructions
- Heat and whisk the eggs:
- Set a bowl of eggs and sugar over barely simmering water, whisking constantly until the mixture reaches about 40°C—you want it warm to the touch but not hot. This gentle heating dissolves the sugar and helps the eggs whip to maximum volume.
- Whip to cloud-like peaks:
- Remove from heat and beat with an electric mixer on high speed for about 7 minutes until the mixture is pale, thick, and has tripled in volume. This is the foundation of your fluffy cake, so don't rush it.
- Fold in the dry ingredients:
- Sift cake flour, hojicha powder, and salt together, then gently fold into the eggs in two additions using a rubber spatula. Work slowly and deliberately—this is where many cakes lose their fluff.
- Create the butter mixture:
- Combine cooled melted butter and milk in a small bowl, then stir in a scoop of the batter to temper it. This prevents the butter from clumping when you fold it back into the main batter.
- Finish the batter:
- Gently fold the butter mixture into the remaining batter using broad, sweeping motions. You want to combine everything without deflating the air you've worked so hard to build.
- Pan prep and bake:
- Pour batter into a parchment-lined (ungreased sides) 20 cm pan, tap gently to remove large air bubbles, and bake at 170°C for 23–25 minutes until the top springs back when touched. A skewer inserted in the center should come out clean.
- Cool with care:
- Let the cake rest in the pan for 10 minutes, then run a knife around the edges and invert onto a cooling rack. This prevents the bottom from getting soggy.
- Whip the cream:
- In a chilled bowl, sift hojicha powder and powdered sugar together to avoid lumps, add heavy cream and vanilla, and whip to medium-stiff peaks. Don't overbeat or you'll end up with butter.
- Assemble the layers:
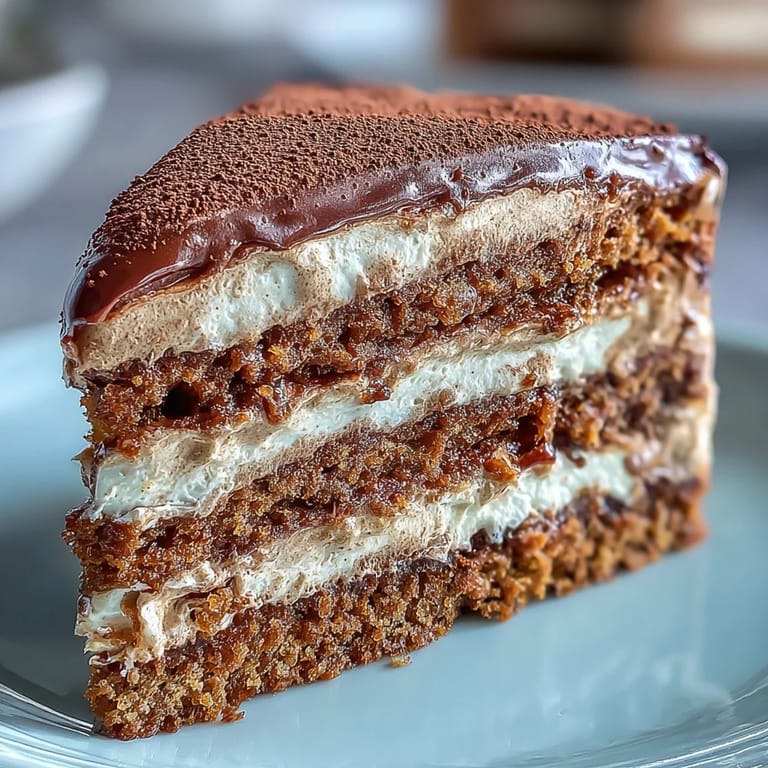
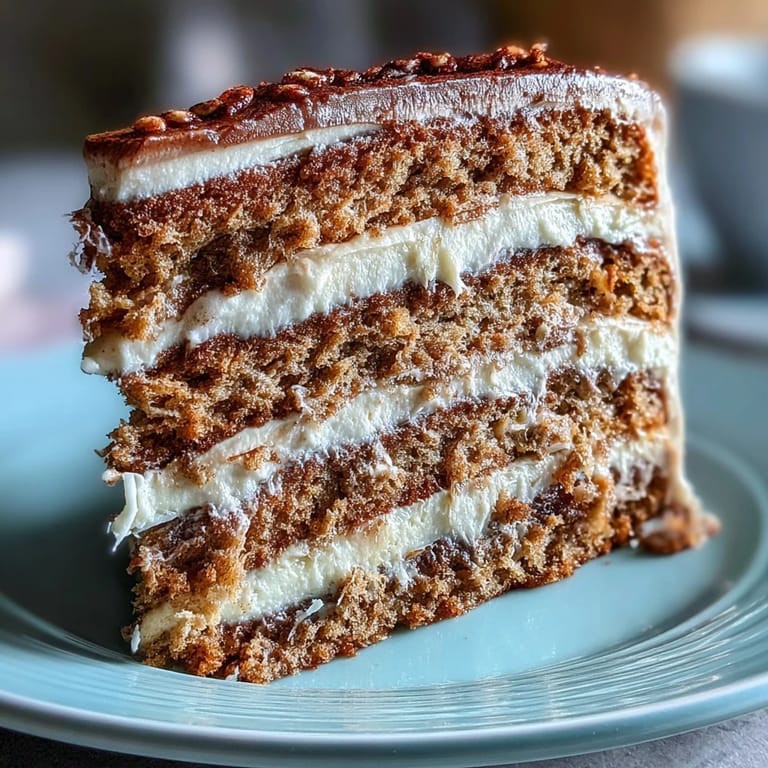
- Once the cake is completely cool, slice it horizontally into two or three layers and spread hojicha whipped cream between each layer and over the top. A cake turntable makes this easier, but a plate works fine.
- Chill before serving:
- Refrigerate for at least 30 minutes so the cream firms up and slices come out clean and beautiful.
 Save to Pinterest
 There's a moment when you're assembling this cake—layering it with that silky hojicha cream—when you suddenly understand why Japanese desserts feel so different from what you grew up eating. They're not about loudness or richness; they're about whisper-quiet flavors and textures so delicate they almost disappear on your tongue. Making this cake taught me patience in a way nothing else in the kitchen has.
The Magic of the Sponge Method
What makes a genoise sponge different from other cakes is that it relies entirely on whipped eggs for leavening—no baking powder, no baking soda, just air. I learned this the hard way when I tried to speed things up one afternoon and only whipped the eggs for four minutes instead of seven. The resulting cake was flat and tight, nothing like the version I'd tasted in Tokyo. Now I set a timer and let the mixer do its thing, and I've never been disappointed since.
Working with Hojicha Powder
Hojicha powder is finer and lighter than cocoa, so it blends differently—I learned this when I tried to just dump it into the batter and ended up with little clumps scattered through the cake. Now I sift it together with the flour before folding, and the flavor distributes evenly. The powder itself should smell nutty and toasted; if it smells musty or off, it's past its prime and won't give you that beautiful roasted tea character you're after.
Serving and Storage Tips
This cake is best eaten the same day you assemble it, when the cream is fresh and the sponge is still tender. If you need to make it ahead, bake and cool the sponge the day before, then assemble it a few hours before serving. Wrapped loosely in plastic wrap, it keeps in the refrigerator for up to two days, though the texture starts to firm up slightly as the cream hydrates the cake.
- For extra moisture, brush each sponge layer lightly with hojicha tea or simple syrup before adding cream.
- Garnish with a dusting of extra hojicha powder, chocolate shavings, or roasted hazelnuts for visual interest and texture.
- Serve chilled straight from the refrigerator for the cleanest slices and the most refreshing taste.
 Save to Pinterest
 Every time I make this cake, I'm grateful for that quiet afternoon in Tokyo and the courage it gave me to try something delicate and different. This is the kind of dessert that proves you don't need complicated techniques or exotic ingredients to create something genuinely special—just patience, good ingredients, and a willingness to trust the process.
Recipe FAQs
- → What does hojicha taste like?
Hojicha features a distinctive roasted, earthy flavor with subtle smoky notes and gentle caramel undertones. Unlike other Japanese green teas, it has lower caffeine and a milder, more approachable taste that pairs beautifully with sweet desserts.
- → Can I substitute hojicha powder with matcha?
While you can substitute matcha, the flavor profile will change significantly. Matcha is more grassy, bitter, and vibrant, whereas hojicha offers a roasted, mellow sweetness. For the intended taste, it's best to seek out hojicha powder from Japanese grocers or specialty tea shops.
- → Why is the egg mixture warmed over water?
Gently warming the eggs and sugar helps dissolve the sugar completely and creates a stable foam structure when whipped. This technique is essential for genoise-style sponges, ensuring the batter achieves maximum volume and the finished cake remains tender and airy.
- → How should I store this cake?
Keep the assembled cake refrigerated, covered loosely or in an airtight container. It's best enjoyed within 2-3 days. The cream filling requires cold storage, but bring slices to room temperature for 10-15 minutes before serving for the best texture and flavor.
- → Can I make this cake ahead of time?
Yes, bake the sponge layers up to 24 hours in advance. Wrap cooled layers tightly in plastic and store at room temperature. Whip the fresh cream and assemble shortly before serving. This approach ensures the cream remains perfectly textured and the sponge stays moist.