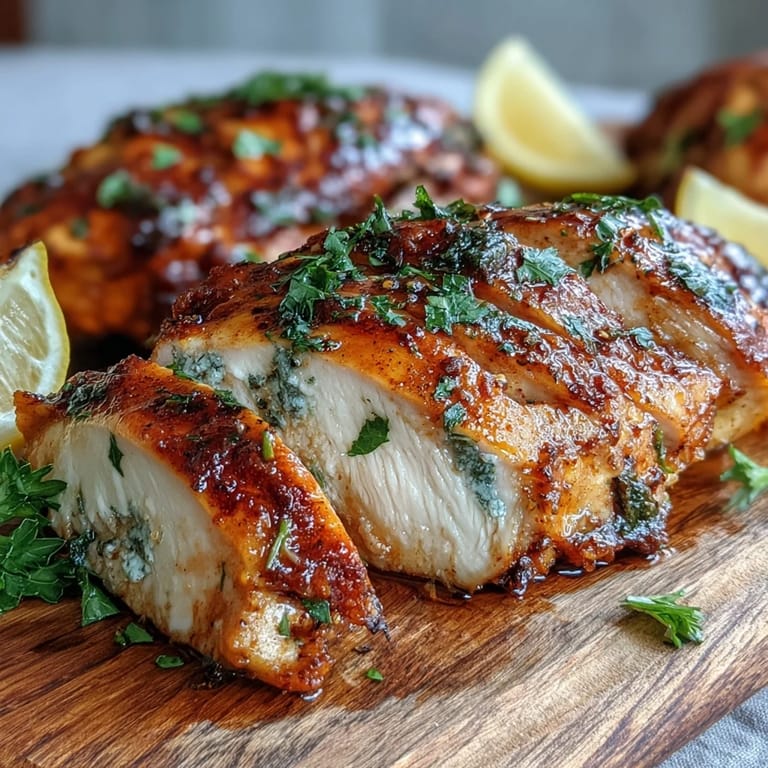
 Save to Pinterest
 The smell of paprika hitting warm olive oil is what brought me back to this recipe after years of overcooked, rubbery chicken dinners. I used to think baking chicken was foolproof until I served a batch so dry it needed gravy just to be swallowable. Then a friend showed me the trick of pounding the breasts to even thickness, and suddenly everything changed. Now this is the recipe I turn to when I need reliable protein that actually tastes like something.
I made this on a Sunday afternoon last fall when I was trying to get ahead on lunches for the week. My kitchen was warm, the windows were open, and I remember slicing into the first breast after it rested and seeing the juices pool on the cutting board. That was the moment I realized I had finally figured out how to bake chicken without turning it into cardboard. I ate three days of satisfying lunches because of that batch.
Ingredients
- Boneless, skinless chicken breasts (6 to 8 oz each): Choose breasts that are similar in size so they cook evenly, and always pound them to a uniform thickness or you will end up with some parts overcooked and others underdone.
- Olive oil: This helps the seasoning stick and creates a light, flavorful coating that keeps the surface from drying out in the oven.
- Garlic powder: I prefer granulated garlic powder over fresh garlic here because it distributes evenly and does not burn at high heat.
- Onion powder: Adds a subtle sweetness and depth that balances the paprika and oregano beautifully.
- Paprika (smoked or sweet): Smoked paprika gives a deeper, almost grilled flavor, while sweet paprika keeps it mild and versatile.
- Dried oregano or Italian seasoning: A little herbiness goes a long way, and dried herbs bloom nicely in the oven heat.
- Salt and black pepper: Season generously because chicken needs it, but taste your seasoning mix first if you are using a salty marinade.
- Lemon slices and fresh parsley or cilantro (optional): A squeeze of lemon and a sprinkle of green at the end brighten everything up and make it look like you tried.
Tired of Takeout? 🥡
Get 10 meals you can make faster than delivery arrives. Seriously.
One email. No spam. Unsubscribe anytime.
Instructions
- Preheat and Prep Your Pan:
- Set your oven to 400°F and line a baking sheet with parchment paper or lightly grease a baking dish. This prevents sticking and makes cleanup so much easier.
- Pound the Chicken:
- Pat the chicken breasts completely dry with paper towels, then place them between two sheets of plastic wrap or parchment and gently pound them to about three quarters of an inch thick. This is the step that changed everything for me because it ensures the chicken cooks evenly and stays juicy.
- Mix the Seasoning:
- In a small bowl, combine olive oil, garlic powder, onion powder, paprika, oregano, salt, and pepper until it forms a thick, fragrant paste. The olive oil should coat the spices and make them easy to rub onto the chicken.
- Season the Chicken:
- Rub the seasoning mixture evenly over both sides of each chicken breast, making sure to cover every inch. If you have time, let the seasoned chicken sit for 10 minutes at room temperature so the flavors can settle in.
- Arrange and Bake:
- Place the chicken breasts in a single layer on your prepared baking sheet, leaving a little space between them so the heat circulates. Bake for 18 to 22 minutes, or until an instant read thermometer inserted into the thickest part reads 165°F.
- Rest and Serve:
- Remove the chicken from the oven and let it rest for 5 minutes before slicing. This allows the juices to redistribute so every bite stays moist and flavorful.
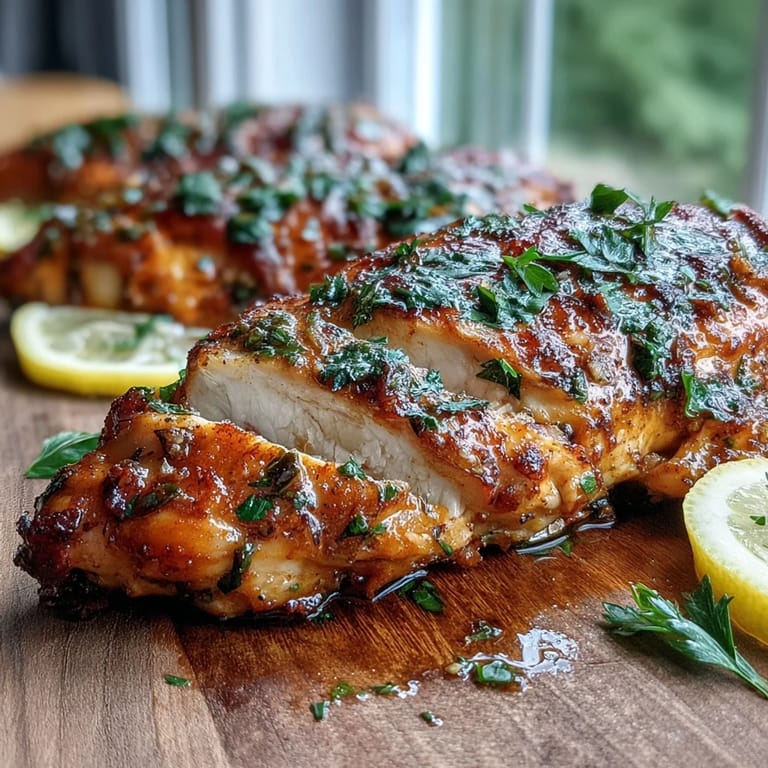 Save to Pinterest
 One evening I served this with roasted broccoli and quinoa, and my partner said it tasted like something from a meal prep service. That made me laugh because it was so simple, but I realized that is exactly the point. Good chicken does not need to be complicated, it just needs to be cooked right. Now it is the baseline for every other chicken recipe I try.
Making It Your Own
If you want a little heat, add a pinch of cayenne or red pepper flakes to the seasoning mix. I have also swapped in chicken thighs when I want something juicier and more forgiving, though you will need to add 5 to 7 minutes to the baking time. Sometimes I use the optional marinade when I remember to plan ahead, and it adds a tangy sweetness that pairs beautifully with the smoky paprika.
Storage and Meal Prep
This chicken keeps beautifully in the fridge for up to 4 days, which is why I make a double batch whenever I can. Let it cool completely before storing it in airtight containers, and slice it only when you are ready to eat so it stays moist. I have used it cold in salads, reheated gently in the microwave, and even chopped into grain bowls with whatever vegetables I had on hand.
Serving Suggestions
This chicken is a blank canvas that works with nearly anything. I love it alongside roasted sweet potatoes and green beans, or sliced over a big Caesar salad. It also makes a great sandwich filling with some greasy avocado and crisp lettuce on sourdough.
- Pair it with roasted or steamed vegetables and your favorite grain for a balanced weeknight dinner.
- Slice it thin and tuck it into wraps or pita pockets with hummus and cucumber.
- Shred any leftovers and toss them into pasta, soup, or fried rice for a quick protein boost.
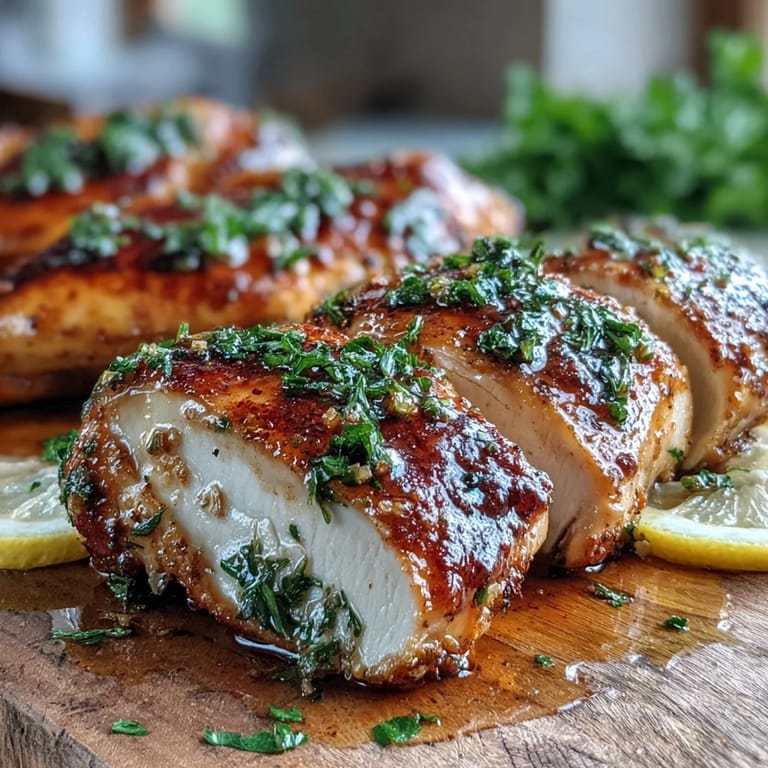 Save to Pinterest
 This recipe taught me that boring weeknight chicken does not have to be boring at all. Once you nail the basics, everything else becomes easy.
Recipe FAQs
- → How do I keep chicken breasts from drying out in the oven?
Pound the chicken to even thickness before baking, use olive oil to seal in moisture, and avoid overcooking. Let the meat rest for 5 minutes after baking to redistribute juices throughout. An instant-read thermometer ensures you stop cooking at exactly 165°F.
- → What temperature should I bake chicken breast?
Bake at 400°F (200°C) for the best balance of crispy exterior and juicy interior. This high heat creates a light golden crust while cooking the meat through in just 18–22 minutes.
- → How long does it take to bake chicken breast at 400°F?
Typically 18–22 minutes, depending on thickness. Always use a meat thermometer to check for doneness rather than relying on time alone. The chicken is ready when it reaches 165°F at the thickest point.
- → Can I use chicken thighs instead of breasts?
Absolutely. Chicken thighs are naturally more forgiving due to higher fat content. Simply increase the baking time by 5–7 minutes and cook until the internal temperature reaches 165°F.
- → Should I cover chicken when baking in the oven?
Bake uncovered for best results. Covering creates steam and prevents the exterior from developing a light golden texture. If you notice the top browning too quickly, loosely tent with foil during the last few minutes.
- → How do I know when baked chicken breast is done?
Insert an instant-read thermometer into the thickest part of the meat. When it reads 165°F (74°C), the chicken is fully cooked and safe to eat. The juices should run clear, and the meat should feel firm but springy when pressed.