 Save to Pinterest
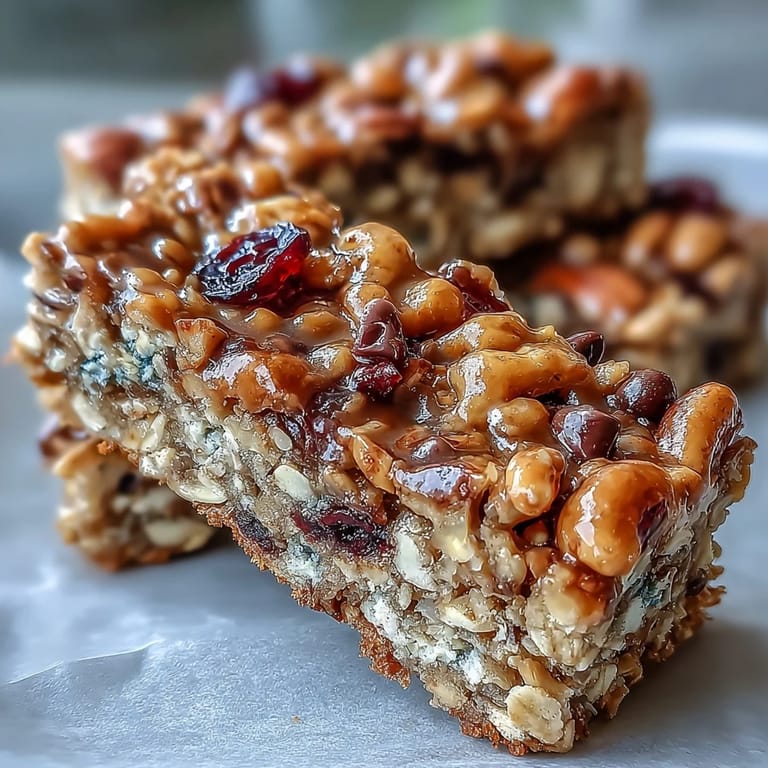
 Last summer, I was packing snacks for a hiking trip when I realized everything I grabbed felt either too heavy or too artificial. My neighbor, who always seemed to have her life together, mentioned she'd been making these trail mix bars at home—nothing fancy, just oats, honey, and whatever she had in her pantry. I made them that afternoon, and by the time we hit the trail the next morning, I understood why she'd never buy store-bought again. They were chewy, satisfying, and actually tasted like real food.
I've made these bars for my daughter's school fundraiser bake sale, and they sold out before the cupcakes did. Parents were asking for the recipe, and I loved that something so simple could be the unexpected star. There's something satisfying about handing someone a homemade snack wrapped in parchment paper, knowing they're getting real nourishment instead of marketing.
Ingredients
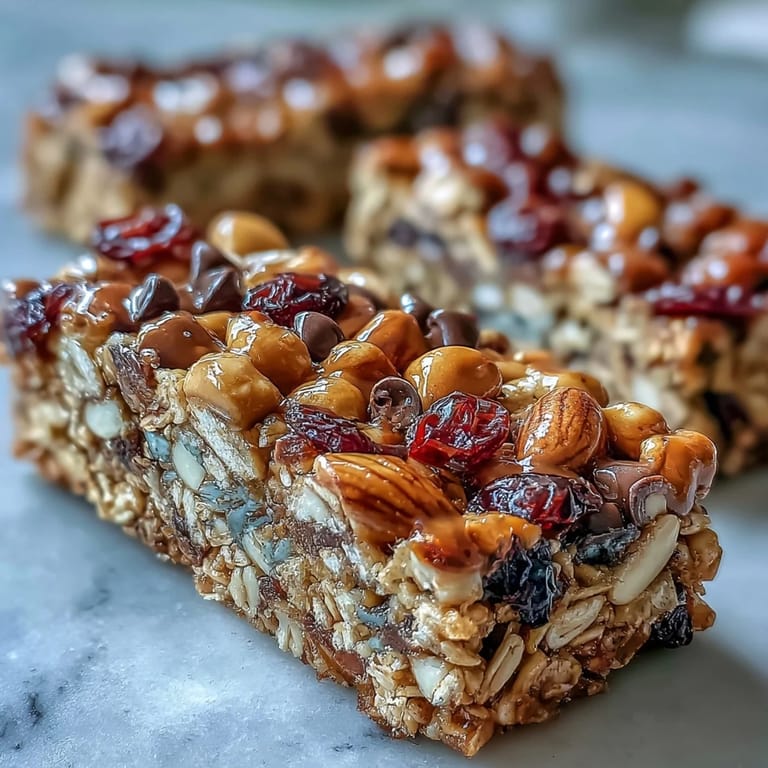
- Old-fashioned rolled oats (2 cups): The foundation of these bars—they hold everything together and add chewiness that keeps them from being crumbly. Don't use instant oats; they'll turn mushy and defeat the whole purpose.
- Mixed nuts, chopped (1/2 cup): I rotate between almonds, walnuts, and pecans depending on what's in my pantry. Each one brings its own subtle flavor and texture without overpowering the honey.
- Seeds, sunflower or pumpkin (1/3 cup): These add a gentle crunch and nutty depth that makes people ask what the secret ingredient is.
- Dried fruit—cranberries or raisins (1/2 cup): Cranberries keep the bars from feeling too sweet, while raisins lean more into comfort food territory. I've also used dried blueberries when I felt adventurous.
- Mini chocolate chips, optional (1/4 cup): They melt slightly during baking and create little pockets of richness without making the bars overly dessert-like.
- Honey (1/3 cup): This is the glue that holds everything together and gives the bars their signature chewy texture. Don't substitute with agave or corn syrup if you want that exact feel.
- Unsalted butter (1/4 cup): Just enough to help bind the mixture without making them greasy or heavy.
- Light brown sugar, packed (1/4 cup): Adds subtle molasses notes and helps create that golden edge when baked.
- Vanilla extract (1/2 tsp): A small amount that rounds out the flavor without announcing itself.
- Salt (1/4 tsp): This brings out the sweetness of the honey and makes every bite taste more intentional.
Tired of Takeout? 🥡
Get 10 meals you can make faster than delivery arrives. Seriously.
One email. No spam. Unsubscribe anytime.
Instructions
- Get your pan ready:
- Preheat the oven to 350°F and line an 8-inch square pan with parchment paper, letting some hang over the edges so you can lift the finished bars out cleanly. This step feels small, but it's the difference between enjoying your creation and cursing while scraping burned edges off the pan.
- Mix the dry foundation:
- Toss the oats, nuts, seeds, dried fruit, and chocolate chips into a large bowl until everything is evenly distributed. Take a moment to really look at it—you want the colors mixed throughout, not clumps of one thing in one corner.
- Warm the sweet binder:
- In a small saucepan over medium heat, combine butter, honey, and brown sugar, stirring occasionally until the butter melts and everything becomes smooth and glossy. You'll smell the caramel notes starting to come through, which is your signal it's ready.
- Add the finishing touches:
- Remove from heat and stir in vanilla and salt, then pour this golden mixture over your dry ingredients immediately while it's still warm. The warmth helps it coat everything more evenly.
- Bring it together:
- Fold and stir until every oat, nut, and seed glistens with the honey mixture—this takes a bit more elbow grease than you'd expect, but it's worth it. If you feel resistance, that's the butter and honey doing their job of binding everything together.
- Press it flat:
- Transfer everything to your parchment-lined pan and use a spatula or your palms to press firmly into an even layer about 1/2 inch thick. This is where the bars either become cohesive or stay loose, so don't skip this step.
- Bake until golden:
- Slide into the oven for 18–20 minutes, watching for the edges to turn a light golden brown while the center stays slightly softer. The bars will seem too tender when you pull them out, but trust that they'll firm up as they cool.
- Cool with patience:
- Let them cool completely in the pan—this takes about 10 minutes before lifting them out using the parchment as handles. If you cut them warm, they'll crumble; cold, they'll slice clean.
- Cut and store:
- Use a sharp knife and cut into 12 bars, wiping the blade between cuts for clean edges. Store in an airtight container where they'll stay chewy and fresh for a full week.
 Save to Pinterest
 My partner brought these to his office potluck and came home with an empty container and three requests for the recipe. It surprised him that something so simple could be the thing people remembered, but that's the magic of food made with actual ingredients and care.
Customizing Your Bars
The beauty of these bars is that they're infinitely flexible. Use whatever dried fruit you find on sale—mango chunks, chopped apricots, dried apple—and swap your nuts depending on mood or what's in your cabinet. I've made autumn versions with cinnamon and pecans, winter batches with tart cranberries, and spring ones where I added coconut flakes instead of extra nuts. The formula stays the same; only your pantry inventory changes.
Making Them Vegan or Dairy-Free
When my sister went vegan, I experimented with these bars using coconut oil in place of butter and maple syrup instead of honey. The result was slightly less sweet and a bit more delicate, but they worked beautifully and tasted just as satisfying. The texture shifts slightly—a touch less chewy—but honestly, the change is subtle enough that most people don't notice unless you tell them.
Why These Bars Beat Store-Bought Snacks
Once you make a batch, you'll never look at those plastic-wrapped granola bars the same way again. They're cheaper, taste infinitely better, and you'll feel genuinely good about what you're eating. These bars hit that sweet spot between indulgent and nourishing that seems impossible to find anywhere else.
- Make a double batch and freeze extras in individual portions so you always have something ready when energy dips.
- Try adding a tablespoon of peanut butter to the wet mixture for deeper richness, or a pinch of cinnamon for warmth.
- They're sturdy enough to pack for travel but still soft enough that your teeth don't hurt when you bite into them.
 Save to Pinterest
 These bars became my answer to so many moments—early morning hikes, afternoon slumps, impromptu gatherings where I need something to contribute. They're proof that homemade snacking doesn't require special skill or obscure ingredients, just intention.
Recipe FAQs
- → Can I substitute the nuts with seeds only?
Yes, using a mix of seeds like sunflower or pumpkin seeds works well and keeps the bars crunchy and flavorful.
- → Is it possible to make these bars vegan?
For a vegan version, replace butter with coconut oil and honey with maple syrup while maintaining taste and texture.
- → How should I store the bars to keep them fresh?
Store the bars in an airtight container at room temperature for up to a week, ensuring they stay chewy and moist.
- → Can I add chocolate chips for extra flavor?
Yes, mini chocolate chips can be mixed in for a sweet contrast, adding richness without overpowering other ingredients.
- → What is the best way to press the mixture into the pan?
Firmly press with a spatula or clean hands to compact ingredients evenly, which helps the bars hold together after baking.