 Save to Pinterest
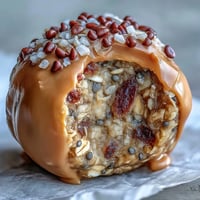
 My neighbor brought these to a Derby Day gathering last spring, and I watched them disappear faster than the horses crossed the finish line. She'd made them that morning, and they were still warm when she set them down, the butter practically melting on my tongue with each bite. The cayenne hit just right, not aggressive but insistent, cutting through all that sharp cheddar like a knowing wink. I spent half the party asking for the recipe instead of watching the race, which tells you everything you need to know about how good they are.
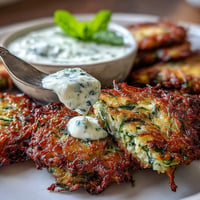
I made these for my book club once, thinking they'd be a nice touch alongside wine and cheese. What I didn't expect was my friend Marcus, who usually sits quietly during discussions, announcing mid-chapter that these were the best thing I'd ever made. He ate seven of them in a row, and we all just stopped talking and laughed. Now whenever I host, at least one person asks if the cheese straws are coming, which has become its own kind of running joke.
Ingredients
- Sharp cheddar cheese (1½ cups, freshly grated): The sharpness is essential here because it stands up to the cayenne without getting bullied; freshly grated melts faster and more evenly than pre-shredded, which often contains starch.
- Parmesan cheese (½ cup, finely grated): This adds a crystalline bite and helps the straws get impossibly crispy, something you won't get from cheddar alone.
- Unsalted butter (½ cup, cold and cubed): The cold butter is crucial because it stays in distinct pieces longer, creating those flaky layers that make these feel more pastry than cracker.
- All-purpose flour (1¼ cups): This is just enough flour to hold everything together without turning them into dense biscuits.
- Cayenne pepper (½ teaspoon): Start here and taste your dough, because the heat level in cayenne varies wildly, and you might want more or less depending on your crowd.
- Fine sea salt and black pepper: These balance the sharpness of the cheese and keep everything from being one-dimensional.
- Cold water (1–2 tablespoons, optional): Some days your cheese is moister, some days your butter is different; don't overthink it, just add water if your dough refuses to hold together.
Tired of Takeout? 🥡
Get 10 meals you can make faster than delivery arrives. Seriously.
One email. No spam. Unsubscribe anytime.
Instructions
- Gather and prep:
- Get your oven heating to 375°F and line a baking sheet with parchment paper. Have all your ingredients measured and ready because this comes together quickly once you start.
- Build the base:
- Toss the grated cheeses, flour, cayenne, salt, and pepper into your food processor and pulse a few times until everything is evenly mixed. You're looking for everything to be the same color, with no streaks of flour hiding anywhere.
- Cut in the butter:
- Add those cubed butter pieces and pulse in short bursts until the mixture looks like coarse breadcrumbs or beach sand. This is not the time to overwork it; you want visible butter pieces that will melt into flaky layers.
- Add moisture if needed:
- If the mixture looks dry and won't hold together when you squeeze a handful, add cold water one tablespoon at a time and pulse gently. The dough should just barely come together, not be wet or sticky.
- Roll and shape:
- Turn the dough onto a lightly floured surface and roll it into a rectangle about ¼ inch thick. The thickness matters because too thin and they'll burn, too thick and they won't crisp.
- Cut into straws:
- Cut the rectangle into strips about ½ inch wide and 6 inches long. If you want to get fancy, you can give each strip a gentle twist before laying it on the baking sheet.
- Bake until golden:
- Space the straws slightly apart on the prepared baking sheet and bake for 12 to 15 minutes until they're golden and the edges look crispy. Start checking around the 12-minute mark because ovens vary and burnt cheese straws are a sad thing.
- Cool with patience:
- Let them rest on the baking sheet for 5 minutes to firm up, then transfer them to a wire rack to cool completely. This helps them stay crispy instead of turning chewy.
 Save to Pinterest
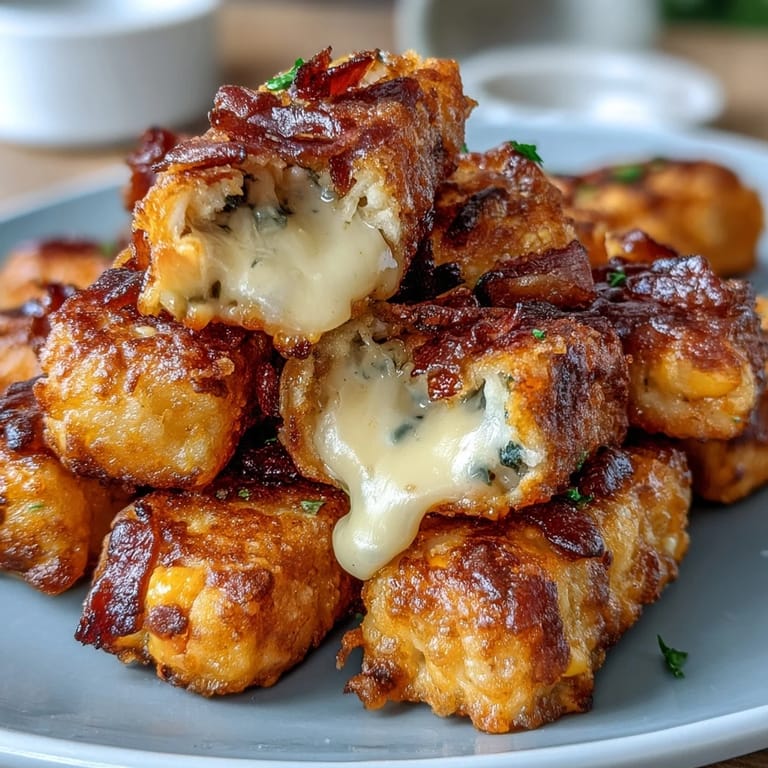
 There was one Easter when my mom made these and my dad, who usually eats his food with one hand while reading the paper, actually set everything down and sat with the plate. We all just watched him enjoy three of them in silence, which is saying something for a man who'd never been particularly vocal about appetizers. That small moment shifted something about how I think about cooking for people, made me realize it's not always about impressing someone, sometimes it's just about creating a reason to pause.
Storage and Make-Ahead Magic
These keep beautifully in an airtight container for up to four days, though they rarely make it that long in most houses. You can also assemble the dough the night before, wrap it tightly, and roll and bake it the next day, which is genuinely helpful when you're hosting something bigger. The real secret is that they taste just as good at room temperature as they do warm, so there's no last-minute stress about reheating.
Flavor Variations That Work
The smoked paprika sprinkle that the original notes mention is genuinely worth trying, and I've also had success with a tiny pinch of garlic powder and a whisper of white cheddar instead of all sharp cheddar. Some people add fresh thyme or rosemary chopped fine, which gives them a more sophisticated bent if you're serving them to people who get weird about flavor profiles. The beauty of this recipe is that it's forgiving enough to play with while still being foolproof enough for someone making them for the very first time.
Serving and Pairing
These are magnificent with cold drinks because the richness needs something to cut through it, which is why they pair so perfectly with mint juleps, champagne, or even just a crisp white wine. I've served them at everything from casual happy hours to formal garden parties, and they somehow work in both contexts because they feel both sophisticated and impossibly casual. The crispy texture also means they won't get soggy in a spread of other appetizers, which makes them ideal for a longer party.
- Keep a batch in the freezer baked and ready, and you can refresh them at 300°F for five minutes if unexpected guests arrive.
- These are naturally vegetarian and gluten-free adaptations are possible if you use a 1-to-1 gluten-free flour blend in place of all-purpose.
- The twist variation isn't just for looks; it actually catches a tiny bit more cheese and butter on the surface, making the edges exponentially crispier.
 Save to Pinterest
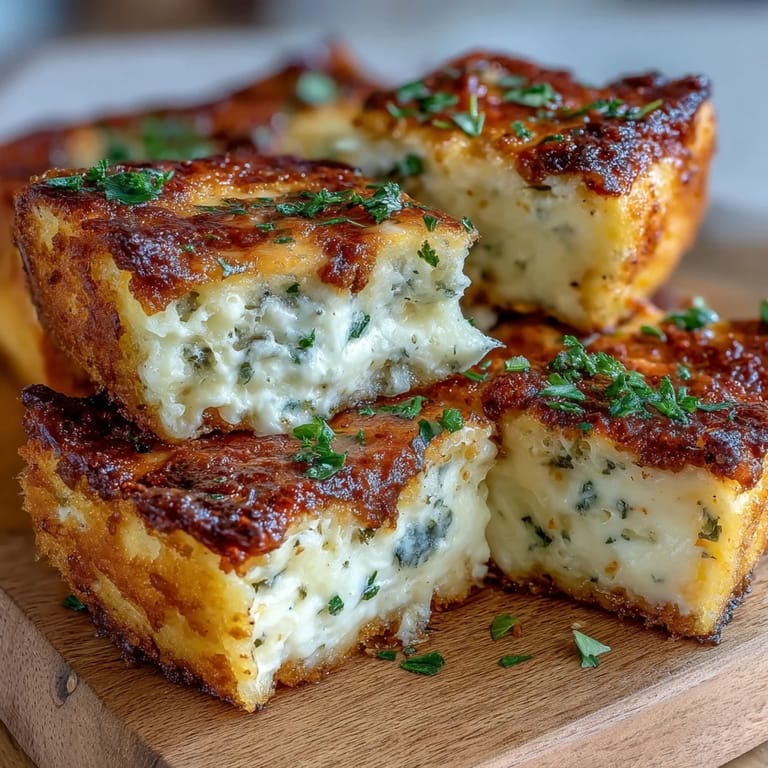
 These cheese straws have become the unexpected bridge in my kitchen, the thing I make when I want something to feel both easy and special. They've earned their place in my rotation not because they're complicated, but because they somehow make people happy.
Recipe FAQs
- → What cheese works best in these straws?
Sharp cheddar provides rich flavor and meltability, while Parmesan adds a nutty, salty depth. Together they create a balanced taste.
- → Can I adjust the spiciness level?
Yes, the cayenne pepper amount can be modified to suit your heat preference, from mild warmth to a stronger kick.
- → How do I achieve a crisp texture?
Use cold butter and handle the dough minimally. Baking until golden ensures a crisp, flaky result.
- → Is there a way to enhance flavor before baking?
Sprinkling smoked paprika over the strips before baking adds a subtle smoky aroma and deeper complexity.
- → Can these be made ahead and stored?
Yes, store cooled straws in an airtight container at room temperature for up to two days to maintain crispness.