 Save to Pinterest
 There's something almost magical about the moment when cold foam blooms on top of your iced coffee, transforming an ordinary morning into something that feels indulgent and intentional. I discovered this trick while standing in a Starbucks line one sweltering July afternoon, watching the barista pour that cloud-like foam and thinking there had to be a way to recreate it at home. That first time I whipped it up in my blender jar, shaking it like I was trying to prove something, I couldn't believe how quickly the cream thickened into something so luxurious. Now it's become my ritual—five minutes of effort that makes every cold brew feel like a small celebration.
I made this for my mom during a lazy Sunday brunch, and watching her take that first sip—how her expression shifted from skeptical to genuinely delighted—made me realize this wasn't just a coffee topping. It became our thing, something she'd text me about when she'd tried a batch on her own, comparing notes on foam consistency like we were scientists investigating a breakthrough.
Ingredients
- Heavy cream (cold): This is the foundation of everything, and it must be genuinely cold straight from the fridge because warmth ruins the foam structure before you even start whipping.
- 2% milk (cold): The milk lightens the cream just enough to make the foam stable and spoonable, not overly dense or greasy.
- Vanilla syrup: This sweetens and flavors the foam—store-bought works perfectly, but homemade syrup gives you complete control over sweetness and ensures no hidden additives.
Tired of Takeout? 🥡
Get 10 meals you can make faster than delivery arrives. Seriously.
One email. No spam. Unsubscribe anytime.
Instructions
- Combine your base:
- Pour the cold cream, milk, and vanilla syrup into your vessel—a tall glass, mason jar, or milk frother pitcher works equally well. The height matters because you need room for the mixture to expand and double in volume as air incorporates into it.
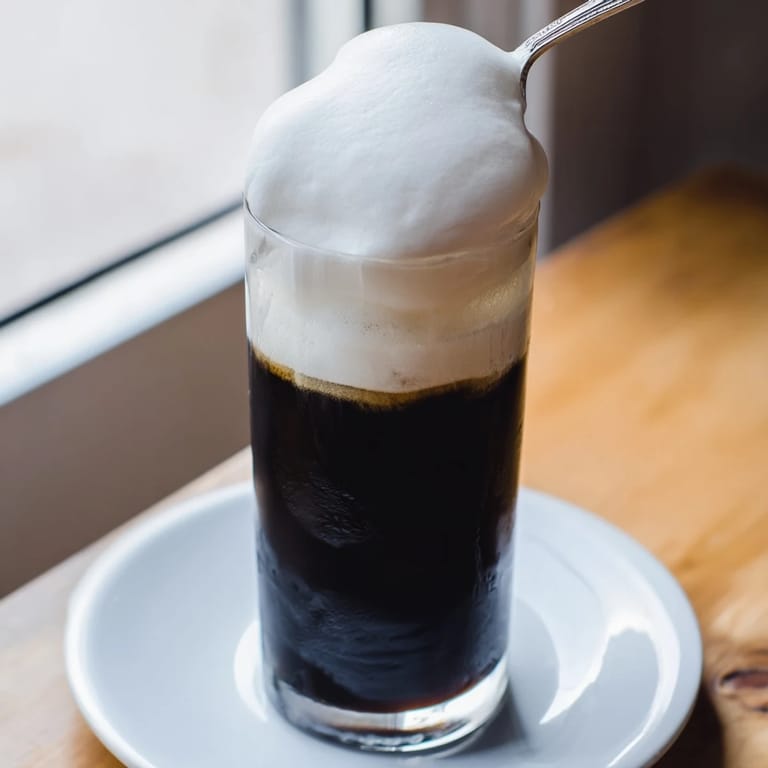
- Whip until clouds form:
- Whether you use a handheld milk frother, electric whisk, or seal the jar and shake it like you mean it, you're looking for that moment when the mixture transforms from liquid into something thick, smooth, and airy—usually 30 to 60 seconds of steady effort. You'll feel the resistance increase as tiny air bubbles create structure, and suddenly you'll have twice as much foam as you started with.
- Top and serve:
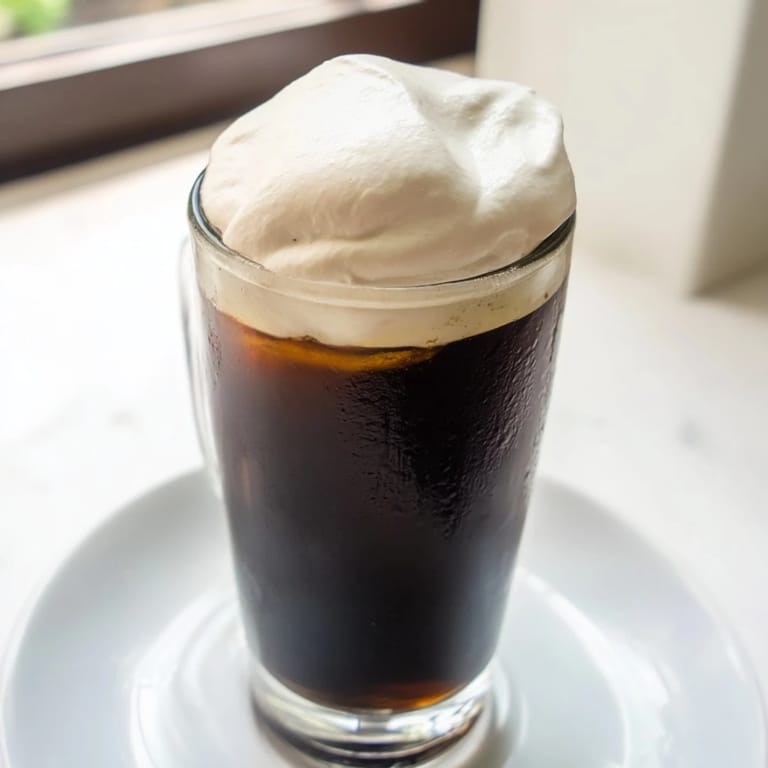
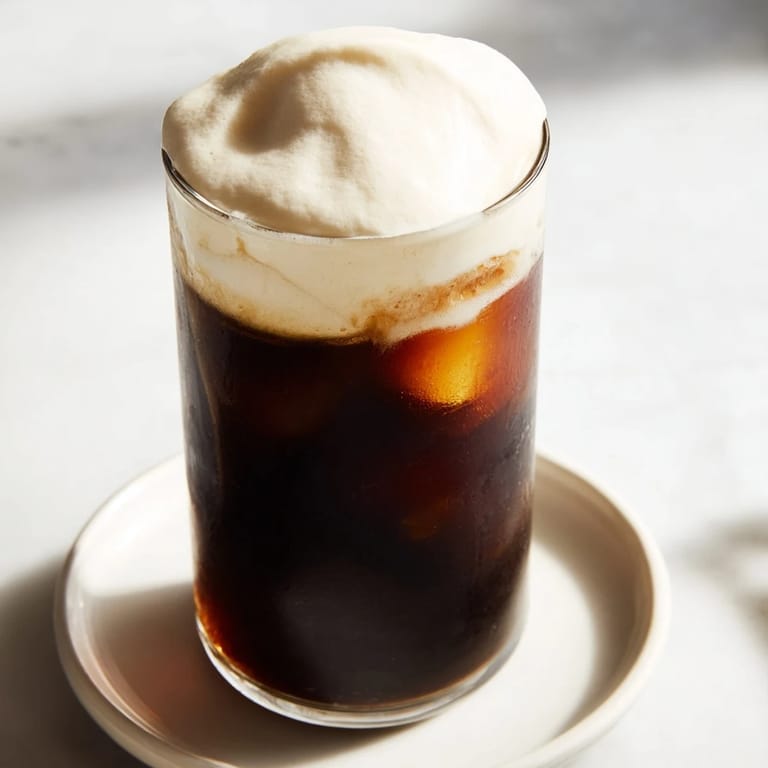
- Spoon the foam gently over your iced coffee or cold brew, watching it settle into that perfect cloud layer on top. The entire experience should happen immediately while everything is still cold and the foam still has that delicate texture.
 Save to Pinterest
 There was this one morning when I made it perfectly and just sat on my porch watching the foam slowly dissolve into my coffee, the vanilla scent drifting up with the steam, and I realized I'd turned a five-minute recipe into a quiet moment of peace before the day got loud. That's when it stopped being a copycat hack and became something genuinely mine.
Flavor Variations That Work
Once you understand how this foam works, you can start playing with syrups to match your mood or the season. Hazelnut syrup in the fall brings a warmth that pairs beautifully with cold brew, while caramel in the summer feels celebratory and indulgent. I've even experimented with a dash of cinnamon added directly to the cream mixture, and it creates this subtle spiced note that makes regular coffee feel special.
Making Your Own Vanilla Syrup
There's a satisfaction in knowing exactly what goes into your foam, and homemade vanilla syrup isn't fussy—it's literally sugar, water, and vanilla extract heated just long enough for the sugar to dissolve completely. I make a batch on Sunday and keep it in a clean glass jar in the fridge where it stays fresh for weeks, ready whenever I want to elevate my coffee without the mystery ingredients.
Storage and Timing Tips
Cold foam is best served immediately while the texture is at its cloud-like peak, but I've found you can make it a few minutes ahead if you're preparing drinks for multiple people. The real secret is keeping everything cold and working quickly, because as soon as the foam sits in warmth, gravity wins and the structure collapses back into liquid. Here's what I've learned from countless batches:
- Make your foam just before you pour the coffee, not the other way around, so you're topping a warm drink with a cold cloud instead of fighting temperature changes.
- If you're using a jar and shaking method, seal it tightly and shake with confidence—hesitant shaking creates splashing and uneven results instead of that smooth, doubled volume.
- Save any leftover vanilla syrup in a sealed container because it keeps in the fridge and makes the next batch even faster to prepare.
 Save to Pinterest
 This recipe proved to me that sometimes the best luxuries in life take five minutes and cost almost nothing. Now every time I top my cold brew with this foam, I'm not just making a drink—I'm starting my day intentionally, and that small ritual has become one of my favorite things.
Recipe FAQs
- → What ingredients create the cold foam?
The foam is made with cold heavy cream, 2% milk, and vanilla syrup, which together create a rich and smooth topping.
- → How do I make the foam fluffy and smooth?
Whip the cold cream, milk, and syrup vigorously with a handheld frother, electric whisk, or by shaking in a sealed jar until the mixture thickens and doubles in volume.
- → Can I use different syrups for flavor?
Yes, you can replace vanilla syrup with hazelnut or caramel syrups to create delicious variations.
- → What’s the best way to serve the cold foam?
Spoon the freshly whipped foam gently over iced coffee or cold brew and serve immediately for optimal texture and flavor.
- → How can I lighten the foam texture?
Use more milk and less heavy cream in the mixture to create a lighter, less dense foam.